Wednesday, December 24, 2008

More Antique Christmas Cards

These antique Christmas cards are made of celluloid, an early form of plastic. There is an inner lining of paper. They date to the turn of the last century.

The designs were used for various occasions. There would have been an appropriate sentiment printed on the inside to suit the particular occasion for which they meant. Some of these cards are very deeply embossed and are truly elegant.
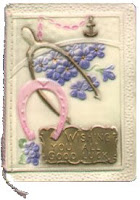
Looking at these cards from a 21st century point of view it is a little difficult to see why these flowers and emblems were used. The Victorians loved to convey coded messages. Floriography, more commonly called the language of flowers, was used allowing individuals to express feelings that otherwise could not be spoken. Remember that Victorian England was very proper and the way in which you presented yourself was of utmost importance.

These are the symbols and flowers depicted on the cards. After reading the individual meanings that I have listed below see if you can find the sentiments that are hidden in these antique Christmas cards.

We associate the swastika with the Nazi regime, but this symbol has a long history in cultural design. It was adopted by them and now has a very unsavory image. The Nazi swastika also had the arms going in the other direction. Traditionally the reverse swastika has been used as a symbol of good luck, welfare, prosperity or victory.

The wishbone usually stands for a wish or desire.

The horseshoe stands for fortune or good luck.

The anchor was an early Christian symbol commonly found in the Roman catacombs. It was used on Christian tombs as a symbol of the hope we have in Christ beyond this life. Most likely the symbol comes from this verse:


"We have this hope as an anchor for the soul, firm and secure. It enters the inner sanctuary behind the curtain, where Jesus, who went before us, has entered on our behalf. He has become a high priest forever, in the order of Melchizedek." (Hebrews 6:19-20

Daisy – Innocence; loyal love; I’ll never tell; purity.

Ivy – Fidelity; friendship; wedded love; affection.

Aster – Love; daintiness.

Pansy – Thoughts; love.

Red roses – Love; I love you.

Bouquet of roses in full bloom – Gratitude.

Blue violet – Watchfulness; faithfulness; I'll always be true.

Don't forget to go to the NORAD Santa tracking site this evening.

Have a very Merry Christmas from me, Len Bentham at Happy Holidays.


Sunday, December 21, 2008

Antique Christmas Cards


Early Christmas cards did not have the iconic images on them that we now associate with Christmas. This antique Christmas card is one of my favourites.


The main body of the card is handmade paper. The top right corner is folded over and held in place by a diamond shaped piece of card, covered in blue velvet. It reveals the smaller card inside the large card. Mounted on top of the blue velvet is an embossed die cut celluloid fan surrounded by violets. The bottom right hand corner has an embossed, die cut metal word "remembrance". There is a blue silk ribbon on the left-hand side with bows at the top and bottom.


The smaller card inside has two undulating lines of glitter at the top and bottom of the picture of the cottage. On the right hand side behind the violets is a die cut fretwork design in white. This would have been an expensive card due to all of the handwork involved.

Tuesday, December 16, 2008

Go to NORAD Santa Tracking Site This Christmas Eve


"For more than 50 years, NORAD and its predecessor, the Continental Air Defense Command (CONAD) have tracked Santa’s Christmas Eve flight.

The tradition began in 1955 after a Colorado Springs-based Sears Roebuck & Co. advertisement for children to call Santa misprinted the telephone number. Instead of reaching Santa, the phone number put kids through to the CONAD Commander-in-Chief's operations "hotline." The Director of Operations at the time, Colonel Harry Shoup, had his staff check radar for indications of Santa making his way south from the North Pole. Children who called were given updates on his location, and a tradition was born." - Copied from the NORAD website page "Why we track Santa."

There are some files that you need to download to your computer, so go to the NORAD Santa tracking link now and you will be able to track Santa on Christmas Eve. It doesn’t matter where you are in the world as the NORAD Santa tracking site tracks him through all 24 time zones. Check to see where he has been, when he will be arriving and where he will be going next.

Sunday, December 14, 2008

It Snowed Last Night!


It snowed last night and everything looks like a Christmas card.  There is more snow on the ground than on the urn arrangement, it is tucked in an alcove by the front door.

People have the opinion that Canada is a land of ice and snow, it isn’t. On the lower end of Vancouver Island we don’t get that much snow. We have had a maximum of 2 weeks of snow in any given winter that I can remember. Some years there has been no snow fall what so ever. Locals refer to the West Coast as the Wet Coast, we get rain.


When I design and make items like "The view from the rim of the 20th century snowbowl was spectacular" it is not only fantasy in that snowmen are alive but that there is snow at all. When it snows here no on is prepared and no one can drive in it properly.

My brother lives in Dawson Creek up north and drives a truck for a living. He said that he wouldn’t drive in this snow. The snow tends to be wet and slippery like soapsuds, it is not fun to drive in. The snow outside right now is powdery so we will be going for a snow walk later. As you can see when the landscape looks like a Christmas card it is a novelty in some areas in Canada.

Have a Merry pre-Christmas.

Saturday, December 13, 2008

The Urn Arrangement


This is the arrangement in the cast iron urn that I mentioned in my last post. I will take you through the steps that went into creating it.


The first photo shows wire screen placed on the opening of the urn with the salal branches in place.


Don’t forget to strip all of your branches of the excess leaves on either side. Inside the urn is a plastic bucket that stays there the year round. In the summer we place a pot of annuals in the urn. It catches any excess dripping water. The bucket also gives a shallower bottom to the urn, so that the branches for the dry autumn arrangement don’t have to be as long.


The next photo shows the cedar in place. All of the branches so far are laid around the outside of the urn to create a base for the arrangement. Some of the branches are sticking up a little but with addition of more branches will make them lay flat.


Two small scrubby fir trees are added side by side to give the effect of one full looking tree. Pine boughs are added next.


I continued the triangular shape by placing the boughs on either side of the fir tree and a few pine boughs in the front of the urn. I want the central area in front of the fir tree to be flatter for a small display to be placed in this area.


Rose hips, hawthorn berries, and holly add colour and interest.


Two bird nests are tucked in the boughs, one in the top of the fir tree and one at the base of the tree. Added to the birds nests are two paper party hats, bird size of course, and a "tin can" telephone made from two thimbles and a length of thin string. Three strands of 50 mini lights are tucked in amongst the foliage. Three large pine cones and ribbon are wired in among the boughs.

It takes a while make a large arrangement but is definitely worth it. I started the arrangement with a concept not a finished idea and then proceeded from there. I hope this inspires you to try some freeform designing of your own.

Have fun getting ready for Christmas. Don't burn out, take time for others and above all have fun.

Wednesday, December 10, 2008

Decorating Our Front Door

Several years ago I picked up an old fishing creel for a dollar,and now we hang it on the door and decorate it for autumn and Christmas. I thought that I would photograph the arrangement as I put it together so that you can see how easy it is.


I have used fir boughs to bulk out the body of the arrangement. I took a long fir bough and cut it into 8" lengths for this basket. Cut them longer if your container is deeper.


Put your branches with the cut stem at the top in the back of the arrangement for bulk and place the tip ends of the branches in the front. By arranging the stems this way you get a full effect that looks like you are using all branch tips. I don’t use floral foam because most of the time I am doing this on the spur of the moment. I would probably use fewer branches and have more control if I used the floral foam but on the West Coast we have lots of fir trees so I fill the basket abundantly.


Next I put in salal branches. The large oval green leaf is a good contrast to the fir branches. Then I tucked in some cedar branches. When you use cedar you must check to see which way it curves as the foliage on either side of the branch curves to the right or to the left. I tucked in some holly and some branches of a shrub in our yard that I don’t know the name of, but it has oval leaves and red berries.


Finally I wired in some cones. I did tuck one cone in the basket so that the foliage would be held in place. Using floral foam would have made this step unnecessary. I always do the arrangement with the basket hanging on the door so that I can see how it is looking.

I have also done an arrangement in a large cast iron urn by the front door that I'll show in my next post.

Friday, November 28, 2008

Christmas is Coming!

Christmas is coming! I love Christmas!


During the Victorian era people complained that Christmas was too commercial. Hasn’t changed much has it? I love the commercialism of it all, but I also realize that that is not what Christmas is about. If it wasn’t for the birth of Jesus there would no Christmas no matter how commercial it has become. Come to think of it Easter would be out of the running as well if Jesus didn’t rise from the grave. Anyway, I love all of the tradition and family customs that go with any holiday. Christmas is one big birthday party with lots and lots of decorations.


I love the shopping. My wife and I usually take one or two days where we treat the shopping as a date. Our "shopping date" originated when the kids were small and my parents babysat them for the day. This was one of those rare times that we had the whole day together. It was a date by default. We continue our "shopping date" now by choice. Making it a date it takes away the dread of Christmas shopping and turns it into an experience that is fun.

We start around 9:00 A.M. hitting various malls and stores, stopping for a coffee and rest, and then off again to do more shopping. We will stop for lunch, go over lists and then on again. It is tiring, I won’t say it isn’t, but it is fun and I look forward to it each year. One tradition is to stop at a book store (sometimes several) and browse. It is very relaxing to stop for the moment and enjoy some time to slow down and look for something that we might like. By the time we get home around 5:00 or 6:00 P.M. we are exhausted. All of the shopping is not done in these shopping safaris; there are always the jaunts off here and there for various gifts and also the ones that we just remembered that we had forgotten to put on the list. As you know it does all get done.

Enjoy your pre-Christmas shopping, decorating, and parties with friends and family.

Wednesday, November 12, 2008

Happy Thanksgiving to my American Friends

  Happy Thanksgiving to my American friends!  

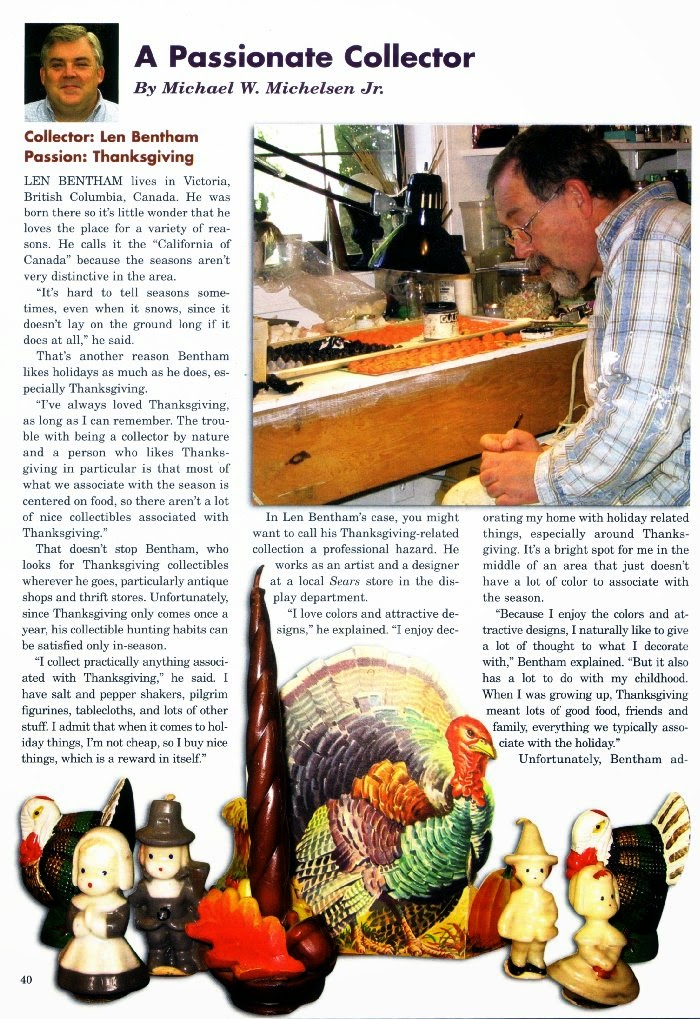
Some of my collection of Thanksgiving related items were featured in the November 2007 issue of "Antiques and Collecting Magazine". Click on each image to get a readable size.


Sunday, November 9, 2008

More New Ornaments

Here are 4 more ornaments for Hallowe’en, better late than never. Besides any time is a good time to buy new holiday decorations!

New Ornaments

As you have seen in previous postings the design and colour of food has been very interesting to me. Here are three new Hallowe’en ornaments with food playing a very important role.


Each of the little iced cakes is a candy box. The hang cord pulls the flap on the back shut.

Friday, November 7, 2008

Life Happens

My intentions for October were to do a number of postings leading up to Hallowe’en but that was not to be. About 6 weeks ago something happened to my back and I have been icing it and popping ibuprofen only if necessary. Between going to the doctor, the chiropractor and getting x-rays (all is fine) I have managed to get a few new items completed. I didn’t even decorate for Hallowe'en this year. Oh well, life goes on and I am doing great.

It has come to my attention recently about a wonderful autumn fair that has had a long and glorious past, known as the "J-O-Lity Fair". Their is also the "J-O-Lity Fair Masked Ball" that is held on the last evening of the fair.

A limited number of souvenirs from the fair have been coming to light. There are also rumours of souvenir masks. Vignettes of a number of the vendors attending this event and participants at the masked ball are surfacing.


Here are three souvenir Fan/Rattles that have been discovered. Only one of each design is available. Click here to go to Happy Holidays for the information.

Monday, November 3, 2008

S.O.P. (Save Our Pumpkins)

I suppose this is a "go green" solution that we have been doing long before "going green" was so important. One or two days after Hallowe’en take those lovely orange globes and cut them up and roast them for use later in the winter. There is a little more prep to it than that but it so worth it.


Do not use pumpkins that have been painted or have had vaseline smeared on the cut edges. Do not use scented candles in the pumpkin either as the fragrance will go into the pumpkin flesh. This process is only for the cut and light style of pumpkin.

Cut your Jack-o-Lantern into quarters. Pick out all of the wax left in the pumpkin. Take a large spoon and rescoop out the insides again. Get rid of any of the charred flesh as well. All of the areas that were cut out, eyes, nose, mouth, lid, and lid opening as well as any charred flesh must be cut away. Cut in about ¼ to ½ inch from the edge of the old cut or charred flesh. Slice the pumpkin into strips about 1-2 inches wide. Peel the rind off of the strips. Coarsely cut the pumpkin into cubes. Place in a roasting pan and cook at 400 degrees until soft. Lots of liquid will be released. Press the pumpkin into the juices and keep roasting until most of the liquid is gone. Take out of the oven pressing the pumpkin up on the sides of the pan so as to soften the caramelized and charred areas. So much good flavour is released if you do this step. Let cool. Scape out as much of the pumpkin and charred areas left in the pan as possible. Process in a food processor and then freeze in freezer bags in the amounts you think you will use. We use about a quart at a time. Use the pumpkin puree in pumpkin pie, baking, soups, stews, or risotto.

Friday, October 31, 2008

Happy Hallowe'en


This image is the front cover from an old school reader that I found in a second hand store. The book most likely belonged to a teacher, it is written on and in terrible shape but the graphics are wonderful. I added the text at the bottom of the image. Have fun everyone.

Sunday, October 12, 2008

Thanksgiving Will Be Here Soon


For my American friends reading this blog, Thanksgiving occurs in Canada the second Monday in October. I love Thanksgiving and I thought that I would share two of our family’s favourite recipes. The first recipe to go along with the postcard of the very thankful turkeys is stuffing. This recipe has been in the family for as long as I can remember. Recipes for stuffing are legion and very personal. This is a basic bread stuffing. Bread stuffing evidently originated in the Edwardian era. My family heritage is English and both sides of the family emigrated to Vancouver Island around 1916. I think that this stuffing came from my fathers side of the family but I’m not certain. My grandfather and my dad were butchers and my grandmother was a caterer for a while. The stuffing is good so thank-you from who ever it came from.

Edwardian Bread Stuffing

3-4 large onions chopped, ground (as in the original recipe), or whizzed in the food processor. Don’t let it get mushy, it should be a little less than ¼ inch in size. One year I over pulsed the onions and the stuffing was not as good.

1 ½ teaspoons of poultry seasoning
6 cups of bread cubed
salt and pepper
1 or 2 eggs

Mix all of the ingredients together and stuff the bird.

People had complained for years that there was never enough stuffing so we now put stuffing under the skin above the breast meat. It flavours the meat and keeps it moist. I insert my hands under the skin and gently separate it from the meat. Stuffing now goes in the back in the cavity and under the skin. It does take longer to cook but is definitely worth it. I also take as much of the fat of the bird as possible so as not to make the stuffing a grease fest. The stuffing recipe now is a little different in its quantities – 3 loaves of French bread (I like French bread because it is a little saltier and has more crust), 2 bags of onions or 10 t0 14 onions,a teaspoon of salt, ½ a teaspoon of pepper sort of, and 6 eggs. I never measure so these quantities are apt to fluctuate during the stuffing making.

The next recipe is from an Aylmer pumpkin tin label that I still have. My mum made this pumpkin pie when we grew up so she must have got the recipe herself from the tin.


Pumpkin Pie

1 can 28 fluid ounces pumpkin
1 ¼ cups brown sugar
¾ teaspoon ginger
1 ½ teaspoon ground cinnamon
2/3 teaspoon mace, nutmeg, or ground cloves – I use mace, not nutmeg or clove, it is so much better
1 teaspoon salt
3 eggs
2 1/3 cups milk

Separate eggs, combining the yolks with the rest of the ingredients. Beat the egg whites to a stiff peak and gently fold them in so as not to break the air pockets in the egg whites. Pour into uncooked pie shells. Place in a preheated oven at 425 degrees for 10 minutes and then reduce to 375 degrees for 35 – 40 minutes. Makes 2 large or 3 small pies.

A side note here, I cook the pies for a bit longer than is usual. I leave them so that the raised areas get a little darker colour but not burnt! This makes the pie a little more firm with the flavours concentrated. Experiment and see how you like your pies, after all they are for you and your families pleasure, have fun.

Saturday, August 23, 2008

Toronto, Cakes, Pastries, and Retro-Rudolphs

Hello everyone, I haven’t done any posts for the last while because my wife and I have been in Toronto visiting our daughter for the last 8 days. It’s great to get away from routine and experience new things.


In my earlier postings I had mentioned how I love candy for its shapes and colours, well I may as well add pastries and cakes to that list.


I was photographing cakes and pastries in bakery windows as well as in the showcase in one bakery/coffee shop.


Beautifully done cakes and pastries are like little sculptures. It is going to be interesting to see how these little morsels make their way into my work, lots of ideas are coming to mind.
Just before we left for Toronto I got in touch with Lori Rudolph of Retro-Rudolphs. We had a great talk and have been sending e-mails back and forth. Check out her website at http://www.freewebs.com/retro-rudolphs/. While you are doing that check out her blog http://retrorudolphs.blogspot.com/.

Sunday, August 3, 2008

Giant fiberglass food

I love the giant fibreglass food that is used in Switzerland to advertise a restaurant or bakery.


The giant ice cream cone was photographed in Bern, Switzerland, it stands almost 6 feet tall! It would be great as a sculpture in our home.


I photographed this giant sausage in Thun, Switzerland, it stands almost 5 feet tall.


This giant croissant was photographed in Interlaken Switzerland, it stands almost 5 feet tall. These sculptures are made commercially. My son mentioned when I was taking the photos that it was like someone photographing McDonalds over here. The fibreglass items in North America are generally cartooned and meant to be "fun" mascots for a fast food chain. These European items are mostly realistic representations of food. I did see a wonderful baker made out various types of bread and pretzels. Unfortunately I didn't get a picture of it or the giant sandwich made in a roll complete with meat, lettuce, and tomatoes. Oh well next time.


The beer jug is at least 8' high and was photographed outside of a restaurant in Grub, Switzerland. It was probably made specifically for the restaurant. It isn't made from a mould and therefore is a little rougher in its finished look.

Saturday, July 26, 2008

Website Update

It certainly has taken longer than anticipated but the new website is up and running. Over the next little while we will be checking everything out, making certain that the links are working properly and the descriptions make sense. Have a look at the site, www.happyholidays.ca and let me know what you think.

Friday, June 20, 2008

Happy Holidays School of Napkin Folding – Day 14


Today is the last day the “Happy Holidays School of Napkin Folding”, I hope you have had fun trying the folds. This last fold is called “The Vase”.

Happy Holidays School of Napkin Folding – Day 13

This next napkin fold would be fun used on a gift at Christmas. In order to use a napkin fold as a gift trim you will have to carefully pin it at strategic points in the fold. Be very careful to keep the sharp end of the pin or pins concealed inside the folds of the napkin. This napkin fold is called “The Slipper”. Have fun coming up with colour schemes for this one.

Happy Holidays School of Napkin Folding – Day 12

The website seems to take longer than anticipated. We are nearing the end of the napkin folding as well as coming near to completion of the site. Hopefully both will coincide. Here’s the next napkin fold to try. This one is called “The Sachet”.

Happy Holidays School of Napkin Folding – Day 11

This napkin fold has an obvious finished shape to stand a wineglass in. Don't go for the obvious, instead fold the rose out of a black silk or taffeta napkin and use it to display a salad of mixed greens and flowers or assorted sherbet in a black stemless martini or wine glass.


Go ahead and fold “The Rose and Star”.

Happy Holidays School of Napkin Folding – Day 10

It would be interesting to find out the history behind some of these folds. This next napkin fold is called “The Pyramid”. I wonder if this fold originated in 1922 when Howard Carter discovered Tutankhamun’s tomb or had it been around under another name and was just renamed to celebrate the discovery? Themed parties and card parties were very popular up until the 1940s so it could have been renamed to go with a particular decorating theme. If anyone has any information about this let me know.

Happy Holidays School of Napkin Folding – Day 9

These three napkin folds are based on a quarter fold and then a diagonal fold. Basic changes give you “The Palm, The Lily, and The Cactus”.

Thursday, June 19, 2008

Happy Holidays School of Napkin Folding – Day 8

The next napkin fold to try is called “The Mitre”.


This fold would be great if you celebrate St. Nicholas Day, just put a few gold chocolate coins under the mitre as a treat for each person at the dinner party.